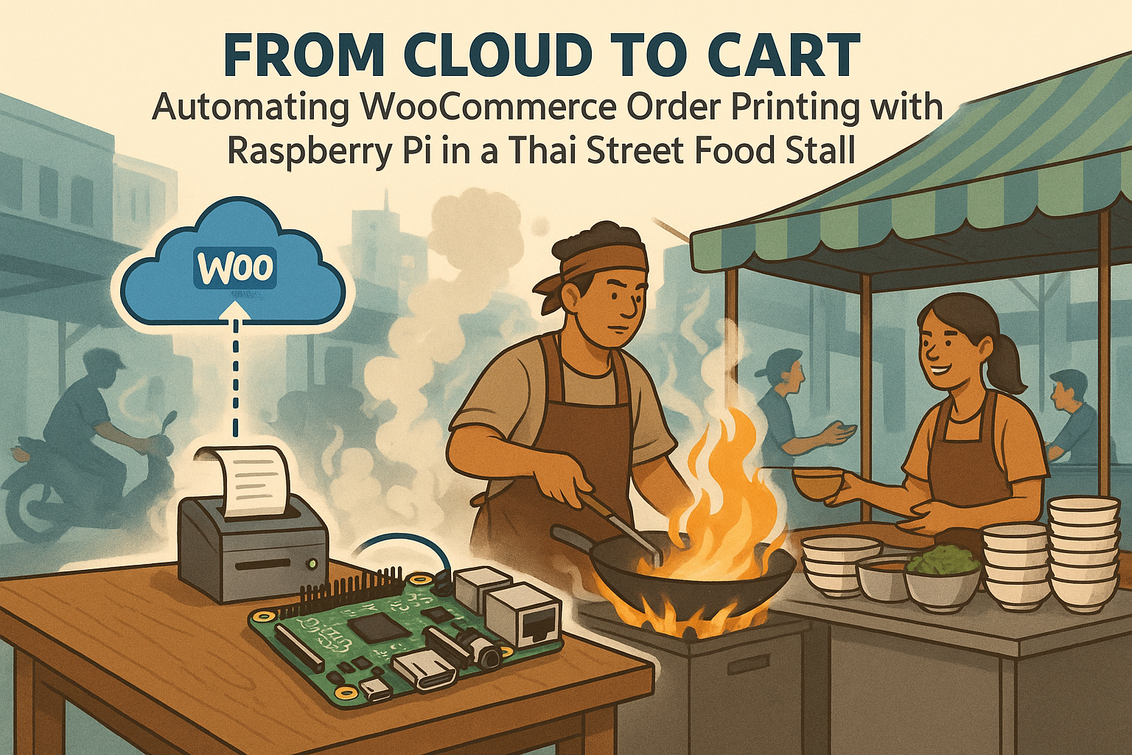
Picture this: a busy Thai street food stall in Bangkok, woks roaring, steam rising, oil popping, and a constant hum of scooters and customers.
Somewhere thousands of kilometers away, a WooCommerce store is running on a polished London Linux server, processing online orders in real time. The challenge is simple to describe but hard to solve: how do you turn each WooCommerce order into an instant, physical printed ticket in the middle of this chaotic, humid kitchen without any staff having to touch a phone, tablet, or laptop? In this article, we’ll architect a complete, real-time, edge-printing pipeline using Raspberry Pi, Nginx, CUPS, Python, and a bit of creative DevOps magic to bridge the gap between cloud commerce and sizzling street food.
Cloud vs.
Cart: The Kitchen Connectivity Crisis
At first glance, it might seem enough to just let the stall owner check orders on a phone. But in the chaos of a lunch rush, manual order management quickly shows its weaknesses. Humidity fogs screens, greasy fingers mis-tap, notifications are missed, and language barriers between tourists, platforms, and staff add confusion. A single missed online order means a hungry customer, a lost sale, and sometimes a bad review that lives forever. The goal of our system is to create a zero-friction bridge between a WooCommerce checkout in London and a physical thermal printer in Bangkok: as soon as a payment is confirmed, a small printer in the stall should scream out a ticket—no apps to open, no browser tabs to refresh, no human in the loop. This is not just convenience; it is operational survival in a high-speed kitchen.
Designing the Edge Gateway: Why Raspberry Pi Wins the Street
To turn digital orders into physical tickets, we need an “edge gateway” that lives in the stall and speaks both internet and hardware.
The Raspberry Pi is ideal here: it’s small, affordable, runs full Linux, has GPIO pins if we ever want to drive buzzers or lights, and can be hardened for hot, oily environments with a proper case. For our use case, a Raspberry Pi 4 or Raspberry Pi 3 Model B+ is perfect. We will install Raspberry Pi OS Lite (minimal image, no desktop) to reduce resource usage and SD card writes. Here is a minimal, beginner-friendly installation sketch once you have flashed Raspberry Pi OS to an SD card with tools like Raspberry Pi Imager:
Section
# First boot: update the Pi
sudo apt update && sudo apt -y upgrade

# Set hostname (e.g. for identification in the stall)
echo "thai-street-printer" | sudo tee /etc/hostname

# Optional: configure locale, timezone, Wi-Fi
sudo raspi-config  # use the menu to set timezone, Wi-Fi country, enable SSH
In a busy kitchen, Wi-Fi can be unstable, so if possible, use a wired Ethernet connection to the router. This alone will dramatically improve the reliability of your printing system across long lunch rushes. In my experience, treating the Pi as an appliance (no keyboard, no mouse, just power and network) makes staff trust it more—it becomes a box that simply prints food tickets.
Securing the Path: Nginx Reverse Proxy and Webhook Ingress
WooCommerce can fire webhooks every time an order is created, paid, or updated.
We will use these webhooks as our trigger—to do that, we must expose an HTTPS endpoint that WooCommerce can talk to, yet still keep things secure. There are two main models: expose Nginx on the Pi to the public internet, or use a London server as the public-facing entry point that tunnels back to the Pi. For many stalls behind NATs and cheap routers, the second option is safer and more realistic. On the London Linux server, we’ll configure Nginx as a reverse proxy that forwards a specific path to the Raspberry Pi over an SSH tunnel. A sample Nginx server block might look like this:
Section
server {
    listen 443 ssl;
    server_name orders.example.com;

    ssl_certificate     /etc/letsencrypt/live/orders.example.com/fullchain.pem;
    ssl_certificate_key /etc/letsencrypt/live/orders.example.com/privkey.pem;

    location /thai-stall/webhook {
        proxy_pass http://127.0.0.1:9000;
        proxy_set_header Host $host;
        proxy_set_header X-Real-IP $remote_addr;
        proxy_set_header X-Forwarded-For $proxy_add_x_forwarded_for;
        proxy_set_header X-Forwarded-Proto $scheme;
    }
}
We’ll bind port 9000 locally on the London server, and let an SSH tunnel from the Pi feed that port. WooCommerce will send its webhook to `https://orders.example.com/thai-stall/webhook`, Nginx will forward it locally, and the SSH tunnel will carry it across continents to a local HTTP listener on the Pi.
Bridging Continents: Persistent SSH Tunnel from Bangkok to London
Because street food stalls often sit behind locked-down, consumer-grade routers, port forwarding is messy and brittle.
A more resilient approach is to have the Raspberry Pi connect outwards to the London server and keep a persistent SSH tunnel open. This way, we do not need to open any ports on the Thai side. On the Pi, we can set up an SSH key and a reverse tunnel like this:
Section
# On the Raspberry Pi: generate a key (no passphrase for automation)
ssh-keygen -t ed25519 -f ~/.ssh/id_ed25519 -N ""

# Copy public key to London server
ssh-copy-id -i ~/.ssh/id_ed25519.pub [email protected]

# Test tunnel: forwards London :9000 to Pi :8000
ssh -N -R 9000:localhost:8000 [email protected]
To keep this tunnel alive across reboots and network glitches, we can turn it into a systemd service on the Pi. For example:
Section
sudo tee /etc/systemd/system/print-tunnel.service > /dev/null << 'EOF'
[Unit]
Description=Persistent SSH reverse tunnel for WooCommerce webhooks
After=network-online.target
Wants=network-online.target

[Service]
User=pi
ExecStart=/usr/bin/ssh -o ServerAliveInterval=30 -o ServerAliveCountMax=3 \
  -N -R 9000:localhost:8000 [email protected]
Restart=always
RestartSec=10

[Install]
WantedBy=multi-user.target
EOF

sudo systemctl daemon-reload
sudo systemctl enable --now print-tunnel.service
This design effectively makes the Raspberry Pi a securely reachable service without directly exposing it to the internet, which is a key digital sovereignty and security win: you control the London entry point, and the Pi only talks to that known host.
Teaching the Pi to Talk to Printers: CUPS and Thermal Printing
Now that we can receive webhook traffic on the Pi, we need to command a physical thermal printer.
In Linux, CUPS (Common UNIX Printing System) is the de facto standard for handling printers of all kinds, including generic ESC/POS thermal printers commonly used for receipts. We’ll install and configure CUPS on the Raspberry Pi OS Lite environment. From the Pi terminal:
Section
# Install CUPS and some common drivers
sudo apt update
sudo apt install -y cups printer-driver-gutenprint

# Allow 'pi' user to manage printers
sudo usermod -aG lpadmin pi

# Optional: allow remote CUPS admin (for your laptop on same network)
sudo sed -i 's/Listen localhost:631/Port 631/' /etc/cups/cupsd.conf
sudo sed -i 's/<Location \/>/<Location \/>\n  Order allow,deny\n  Allow @LOCAL/' /etc/cups/cupsd.conf

sudo systemctl restart cups
Then, from a laptop on the same network, visit `http://thai-street-printer:631` (or the Pi’s IP), add your USB or network thermal printer, and test a text print. If you use a generic ESC/POS printer, search for drivers like “Generic / Text-Only” or consult projects such as `escpos-php` and `python-escpos` for hints. Once CUPS recognizes the printer name (e.g. `ThaiKitchen_Printer`), we can send jobs using the `lp` command, which our Python code will use later.
Building the Webhook Listener in Python
Our next step is to listen for HTTP POST requests coming through the SSH tunnel and Nginx.
We can use a lightweight Python web framework such as Flask or FastAPI to keep things approachable for beginners. Let’s choose Flask for simplicity. We’ll build a small service that accepts WooCommerce webhook JSON, parses the order data, and formats a clean textual ticket. First, install the basics on the Pi:
Section
sudo apt install -y python3 python3-pip
pip3 install flask requests
Now create a simple listener, `/home/pi/woo_print_listener.py`:
Section
from flask import Flask, request, jsonify
import subprocess
import datetime

PRINTER_NAME = "ThaiKitchen_Printer"  # replace with your CUPS printer name

app = Flask(__name__)

@app.route("/webhook", methods=["POST"])
def handle_webhook():
    data = request.get_json(force=True, silent=True) or {}

    # Basic validation: optionally check a secret header from WooCommerce
    # secret = request.headers.get("X-WC-Webhook-Signature")
    # TODO: verify signature for security

    ticket_text = format_ticket(data)
    print_ticket(ticket_text)

    return jsonify({"status": "printed"}), 200

def format_ticket(order):
    # This function depends on WooCommerce webhook structure
    # Reference: https://woocommerce.github.io/woocommerce-rest-api-docs/
    lines = []
    now = datetime.datetime.now().strftime("%Y-%m-%d %H:%M:%S")
    lines.append("*** THAI STREET FOOD ORDER ***")
    lines.append(f"Time: {now}")

    order_id = order.get("id", "-")
    status = order.get("status", "-")
    currency = order.get("currency", "THB")

    lines.append(f"Order ID: {order_id}")
    lines.append(f"Status: {status}")
    lines.append("")
    lines.append("Items:")

    items = order.get("line_items", [])
    for item in items:
        name = item.get("name", "Item")
        qty = item.get("quantity", 1)
        total = item.get("total", "0.00")
        lines.append(f"- {name} x{qty} = {total} {currency}")

    lines.append("")

    billing = order.get("billing", {})
    customer_name = f"{billing.get('first_name', '')} {billing.get('last_name', '')}".strip()
    phone = billing.get("phone", "-")

    lines.append(f"Customer: {customer_name}")
    lines.append(f"Phone: {phone}")

    if order.get("shipping_lines"):
        lines.append("")
        lines.append("Shipping:")
        for s in order["shipping_lines"]:
            lines.append(f"- {s.get('method_title', 'Delivery')}")

    lines.append("")
    lines.append("*** COOK FAST, SERVE HOT! ***")
    lines.append("\n\n\n")  # feed paper

    return "\n".join(lines)

def print_ticket(text):
    # Send to CUPS via 'lp'
    try:
        subprocess.run(["/usr/bin/lp", "-d", PRINTER_NAME],
                       input=text.encode("utf-8"), check=True)
    except Exception as e:
        # In a real setup, log this to file for troubleshooting
        print("Print error:", e)

if __name__ == "__main__":
    # Listen only on localhost (tunnel will provide external access)
    app.run(host="127.0.0.1", port=8000)
This small service converts each webhook into plain-text ticket lines and uses CUPS to print. Note that in production, you should validate WooCommerce signatures (`X-WC-Webhook-Signature`) to prevent fake orders from being printed. For more, see the official WooCommerce REST API docs at https://woocommerce.github.io/woocommerce-rest-api-docs/.
Turning the Listener into a Service and Managing Queues
We want the Python listener to run automatically in the background and survive reboots and crashes.
On Raspberry Pi OS, systemd is our tool of choice. This is classic DevOps: treat your Python script like a small microservice. Create a unit file:
Section
sudo tee /etc/systemd/system/woo-print-listener.service > /dev/null << 'EOF'
[Unit]
Description=WooCommerce webhook listener for Thai street food printer
After=network-online.target
Wants=network-online.target

[Service]
User=pi
WorkingDirectory=/home/pi
ExecStart=/usr/bin/python3 /home/pi/woo_print_listener.py
Restart=always
RestartSec=5
Environment=PYTHONUNBUFFERED=1

[Install]
WantedBy=multi-user.target
EOF

sudo systemctl daemon-reload
sudo systemctl enable --now woo-print-listener.service
CUPS itself already maintains a local print queue. If the printer is briefly offline—someone unplugs it, or the cable shakes loose—the jobs are held and retried. This buffering is crucial in environments with flaky power and intermittent connectivity. If you want a further safety net, you can log each incoming order to a local file (`/var/log/thai-orders.log`) and create a simple replay script. That way, if the SD card fails or the printer jams, you still have a textual audit trail of what the Pi attempted to print.
Connecting WooCommerce: Configuring the Webhook
With our infrastructure in place—the Pi service, SSH tunnel, and Nginx reverse proxy—we can finally wire WooCommerce into the system.
In your WooCommerce admin panel on the London server, navigate to:
– WooCommerce > Settings > Advanced > Webhooks
– Click “Add webhook”.
Configure something like this:
– Name: `Thai Street Stall Printer`
– Status: `Active`
– Topic: `Order created` or `Order paid` depending on your workflow
– Delivery URL: `https://orders.example.com/thai-stall/webhook`
– Secret: generate a strong random string
– API Version: `WP REST API Integration v3` (or the recommended version on your store)
In your Python listener, you can verify the `X-WC-Webhook-Signature` header using the same secret; WooCommerce uses an HMAC-SHA256 signature over the request body. A pseudo-code example:
Section
import hmac
import hashlib
import base64

WEBHOOK_SECRET = "your-long-random-secret"

@app.route("/webhook", methods=["POST"])
def handle_webhook():
    raw_body = request.get_data()  # bytes
    signature = request.headers.get("X-WC-Webhook-Signature", "")

    expected = base64.b64encode(hmac.new(
        WEBHOOK_SECRET.encode("utf-8"),
        raw_body,
        hashlib.sha256
    ).digest()).decode("utf-8")

    if not hmac.compare_digest(signature, expected):
        return jsonify({"error": "invalid signature"}), 401

    data = request.get_json(force=True, silent=True) or {}
    ticket_text = format_ticket(data)
    print_ticket(ticket_text)
    return jsonify({"status": "printed"}), 200
Once this is live, place a test order on your WooCommerce store. If everything is set up correctly, you should hear that glorious buzz of thermal paper in the Thai stall the moment you press “Pay.” This is the cyber-gourmet version of ringing the kitchen bell.
Hardening for Heat, Humidity, and Power Cuts
Unlike a climate-controlled office, a street food stall is brutal to electronics: temperature, grease, dust, and power instability abound.
To build a truly reliable printing node, we must treat the Raspberry Pi like industrial hardware. Some practical hardening steps:
– Use an industrial-grade or rugged enclosure with dust filters and an internal fan.
– Mount the Pi away from direct heat sources and splashing oil—high shelves or under counters are often better.
– Add a small UPS (uninterruptible power supply) or a dedicated power bank with pass-through charging to smooth out power glitches.
– Move rapidly written directories (`/var/log`, temporary files) to RAM using `tmpfs` to reduce SD card wear.
Here is an example of mounting `/tmp` and `/var/tmp` in RAM in `/etc/fstab`:
Section
sudo tee -a /etc/fstab > /dev/null << 'EOF'
tmpfs   /tmp        tmpfs   defaults,noatime,nosuid,size=100m   0  0
tmpfs   /var/tmp    tmpfs   defaults,noatime,nosuid,size=50m    0  0
EOF

sudo mount -a
You can go further and redirect logs to a remote syslog server on the London side, or rotate them aggressively to cut down writes. From a Creative DevOps perspective, I find this part fascinating: we are using the same system-hardening techniques used in data centers, but applied to a humble food cart that just wants to print orders reliably.
Measuring Performance: Latency from Click to Ticket
For staff in the stall, the real question is not what technologies are used, but whether the ticket prints fast enough to keep up.
Our pipeline has several hops—WooCommerce, Nginx, SSH tunnel, Flask, CUPS, the printer. To quantify end-to-end latency, you can instrument both ends. On the WooCommerce side, log a timestamp when the order is created. On the Pi side, log a timestamp when the ticket is sent to CUPS. Compare these to understand the delay. You can add basic logging in the listener:
Section
import time

@app.route("/webhook", methods=["POST"])
def handle_webhook():
    start = time.time()
    raw_body = request.get_data()
    # ... signature validation and JSON parsing ...
    print_ticket(ticket_text)
    end = time.time()
    print(f"Order processed in {end - start:.3f} seconds")
    return jsonify({"status": "printed"}), 200
In most real-world tests, you can achieve sub-2-second printing from the moment the payment is confirmed, often under one second on a stable network. That’s fast enough that the kitchen staff often hear the printer before the customer looks up from their phone, realizing the order is already heading into the wok.
The Live Lunch Rush Test: Human Factors and Workflow
Technology success is not just about packets and bytes; it is also about humans under pressure.
When deploying this system into a live Thai street food stall, one of the first things you will notice is the shift in staff behavior. Previously, one person often had to be “the phone watcher”—checking WhatsApp, delivery apps, or WooCommerce notifications. That role is mentally exhausting and prone to mistakes. With an automated thermal printer, staff simply listen for the printer, grab the ticket, pin it to a rail, and cook. Throughput increases because the ordering pipeline is smoother, and staff attention returns to actual cooking and customer interaction instead of screen management. It is worth doing a soft launch: run the system in parallel for a few days, keeping manual checks as a backup, and gather feedback. For example, you might learn that line items need to be printed in Thai for kitchen staff but in English for a delivery runner—this leads to multi-language ticket templates.
Scaling the Model: From One Stall to a Global Fleet
Once you have a single Raspberry Pi + WooCommerce + CUPS stack running reliably in Bangkok, the pattern becomes repeatable.
Any global e-commerce or restaurant business that needs local, instant printing can use the same architecture. Key scaling ideas:
– Centralize your configuration in the London server (Nginx, webhook management) and treat each Pi as a node with its own tunnel and printer mapping.
– Use Ansible or similar tools to push updates (new Python versions, new ticket formats) to all edge nodes securely.
– Maintain per-stall environment variables so you can control behavior—currency, language, opening hours—without logging into each device manually.
– Consider observability: use tools like Prometheus Node Exporter or simple HTTP health checks to monitor node uptime.
The beauty of this model is that it respects digital sovereignty: each stall owns its hardware and can continue printing orders locally even if the internet goes flaky for a few minutes, thanks to CUPS queues, while the centralized server only orchestrates.
Security, Privacy, and Open Source Ethics
When you start piping customer data (names, phone numbers, order contents) into small devices in public spaces, you must think about security and privacy.
Some best practices include:
– Encrypt all traffic between WooCommerce and your entry server (HTTPS with Let’s Encrypt, see https://letsencrypt.org/).
– Restrict SSH access to the London server using keys only, and optionally IP allowlists or tools like Fail2Ban.
– Store minimal data on the Pi; avoid logging full customer details unless required, and rotate or anonymize logs regularly.
– Keep the Raspberry Pi OS updated and avoid running unnecessary services that expand your attack surface.
On the positive side, relying on open source tools like Raspberry Pi OS, Nginx (https://nginx.org/), CUPS (https://www.cups.org/), and Python gives you transparency and community backing. You are not locked into a proprietary cloud printing vendor, and you can audit or customize every part of your pipeline. That aligns well with the broader movement toward digital sovereignty: small businesses owning their tech stack rather than renting black-box services.
Putting It All Together: A Cyber-Gourmet Blueprint
Stepping back, what we have built is more than just a “webhook that prints.” It is a full, creative computing pipeline that fuses cloud e-commerce, edge hardware, and open source software into a single, coherent system tailored to the realities of Thai street food.
The ingredients are straightforward: a London-based WooCommerce store firing webhooks; an Nginx reverse proxy handling HTTPS and routing; a persistent SSH tunnel making a Raspberry Pi reachable across firewalls; a Flask-based webhook listener translating JSON into text; CUPS orchestrating a thermal printer; and hardening measures ensuring that this little box can live next to a sizzling wok without giving up. Along the way, we’ve illustrated how Creative DevOps thinking can step out of the data center and into the market stall, how Fusion Development mixes hardware, software, and human workflow, and how digital sovereignty can be practical and tasty: your code, your devices, your food, your customers. Once you master this pattern, you can take it anywhere—coffee trucks, pop-up bars, craft breweries, even remote farm shops—anywhere sales happen in the physical world but are triggered in the cloud.